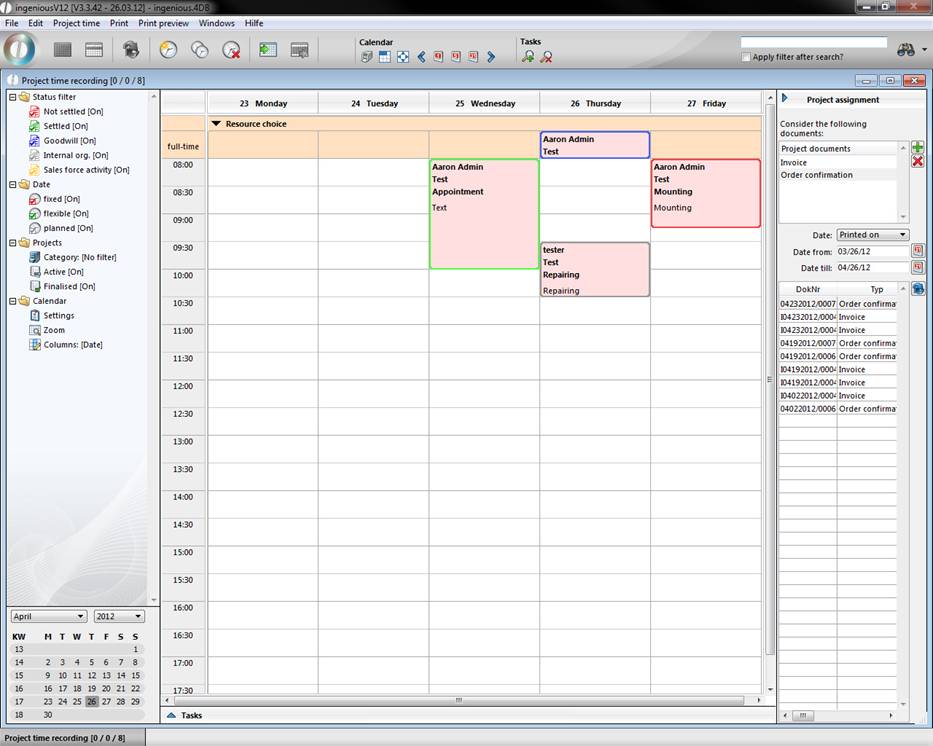
With the help of the time management (also known under the concept “Project time recording”) all working hours of the company are rendered transparent. For a better overview work procedure colors are assigned according to the calculability.
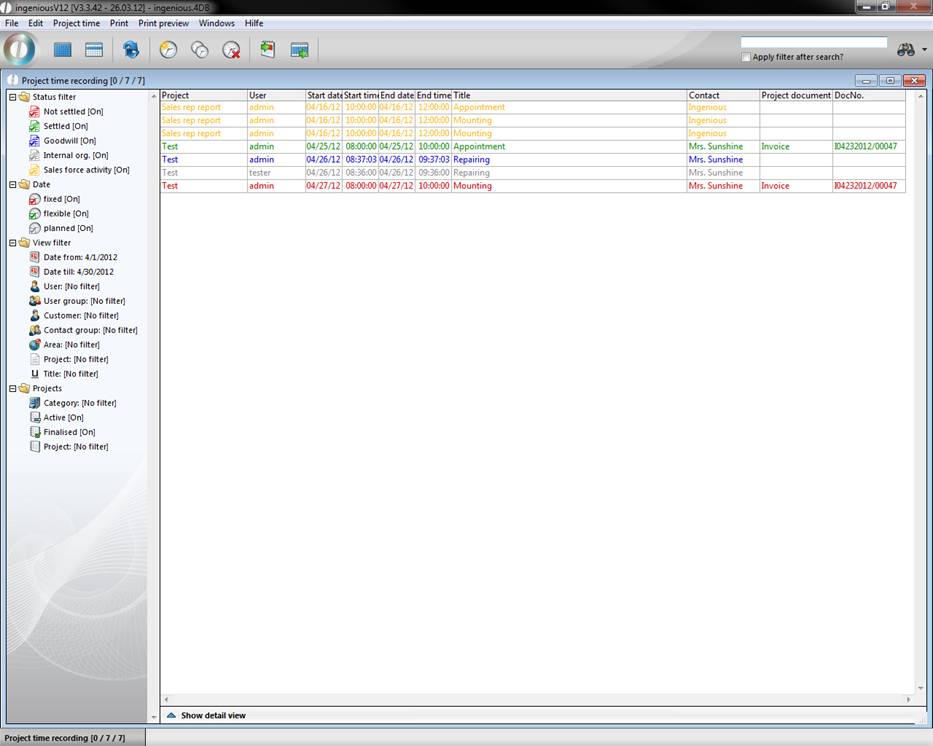
Color scheme used:
Green = Settled
Red = Not settled
Blue = Godwill - Not billable
Grey = Internal administration - Not billable
Yellow = Field work
To grasp a time involved, click on the ![]() button or press the F4 function key on your keyboard. In the next window, you have the possibility to choose a project to start again.
button or press the F4 function key on your keyboard. In the next window, you have the possibility to choose a project to start again.
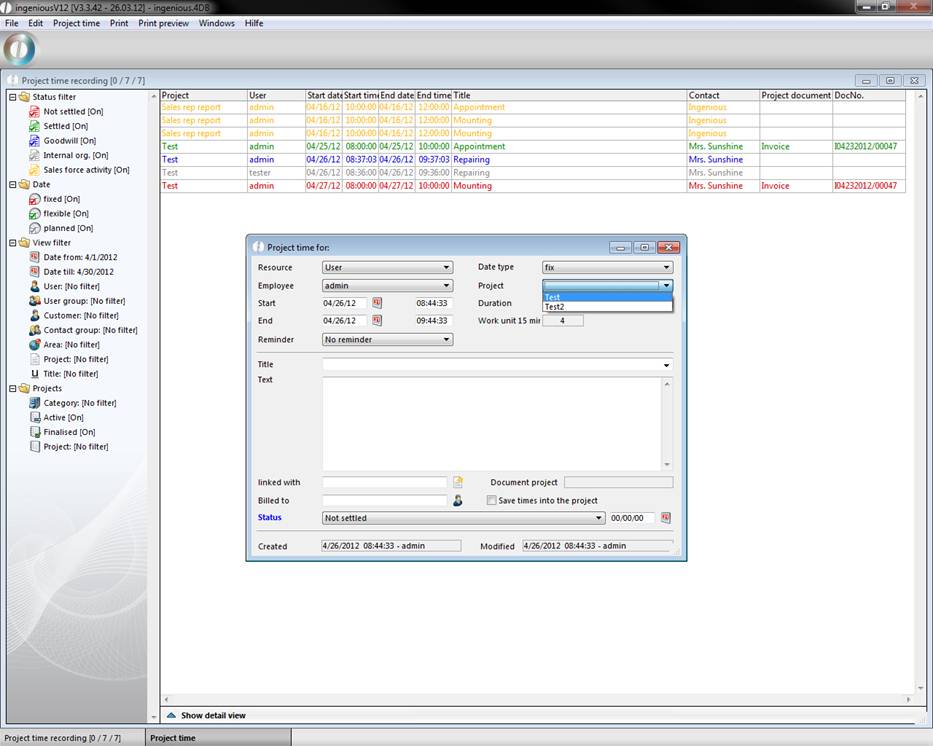
The choice of an already available project occurs through the folding “Project” list field.
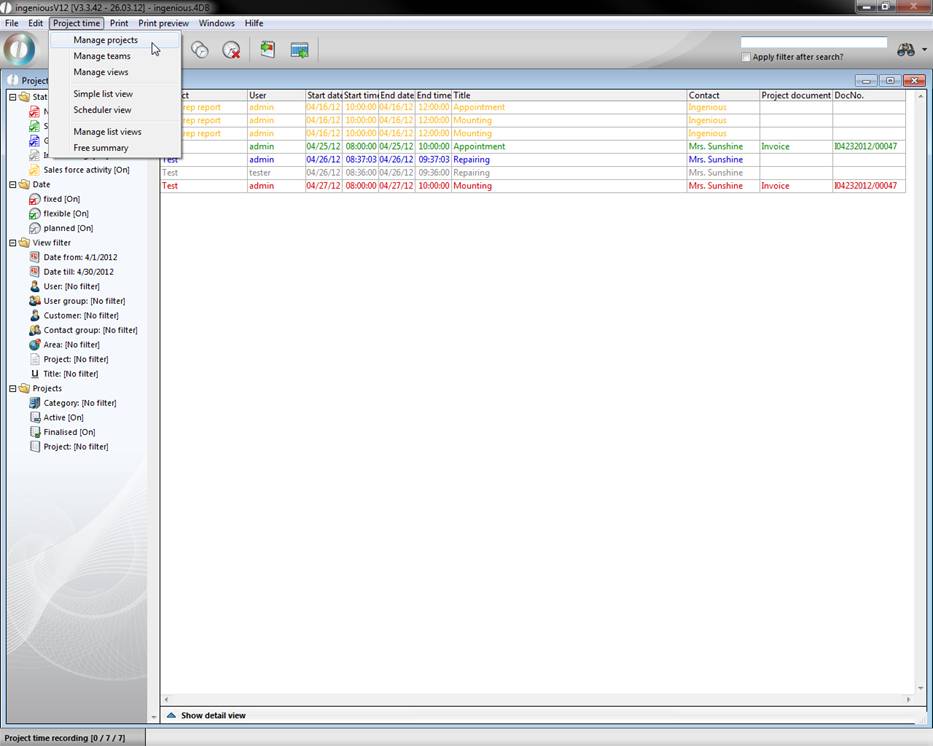
To start a new project, you can manage with the “Project time / Projects” menu.
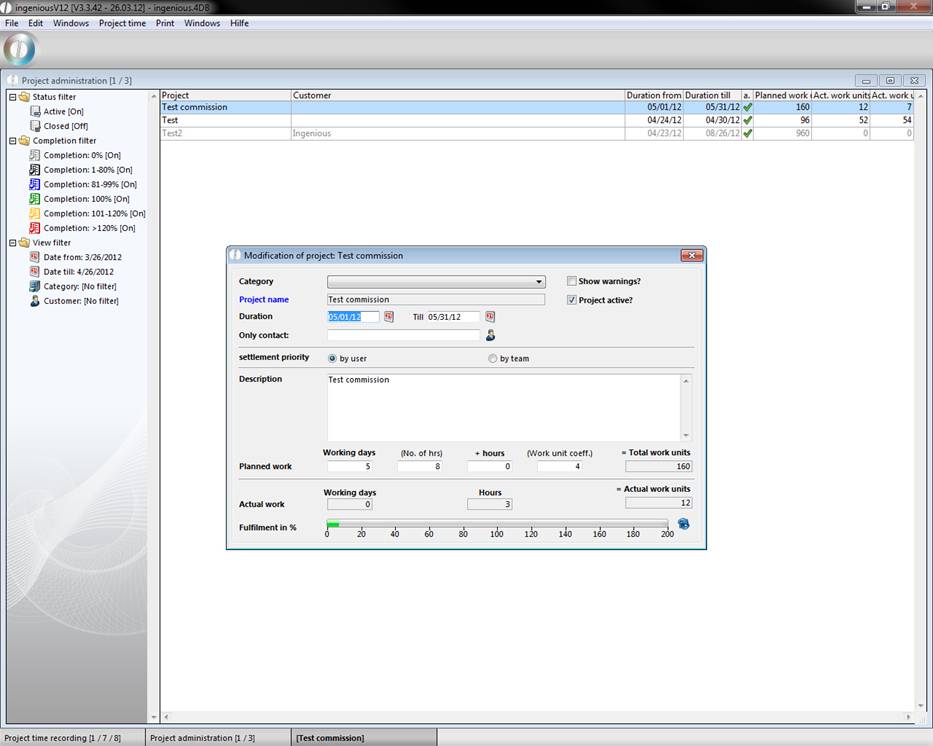
The “Project Management” window opens, and by clicking on the ![]() button, you can create a new commission. Next, you fix the desired committee name and the time period. Then you have to bind the possibility of the project directly to a customer. In the “Description” field, you can more precisely explain the project. In the area, “Planning expenditure”, you determine the number of the working days and the hours according to how high the weekly working time summary should be. In the areas, “Actual Status” and “Fulfillment in %”, you already have an overview of whether the working time summary is operating according to plan.
button, you can create a new commission. Next, you fix the desired committee name and the time period. Then you have to bind the possibility of the project directly to a customer. In the “Description” field, you can more precisely explain the project. In the area, “Planning expenditure”, you determine the number of the working days and the hours according to how high the weekly working time summary should be. In the areas, “Actual Status” and “Fulfillment in %”, you already have an overview of whether the working time summary is operating according to plan.
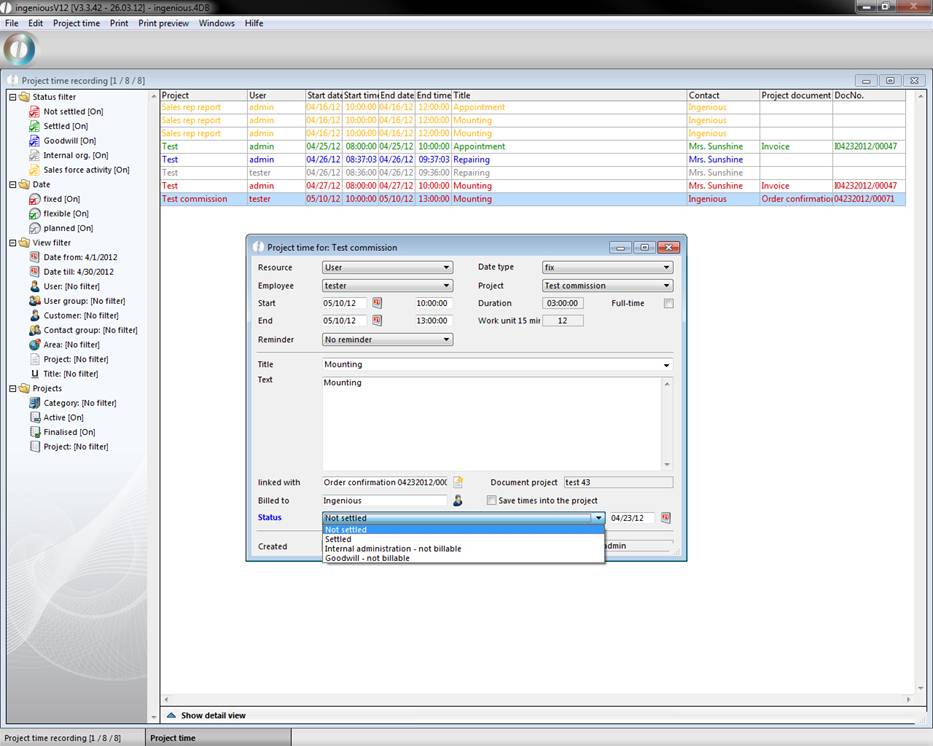
In the project time entry you have two possibilities to gather the used working hours. You manually provide the time in the fields “Start time” and “End time”. The automatically measured time by Ingenious.V12 is given as a working hour unit per 15 minutes. All-day accrued work can be noted by highlighting the field “All-day”. Titles and text of the job performance are given individually in the suitable fields.
The settings that are selected in the “Status” selection field, determine the latter color representation of the time involved.
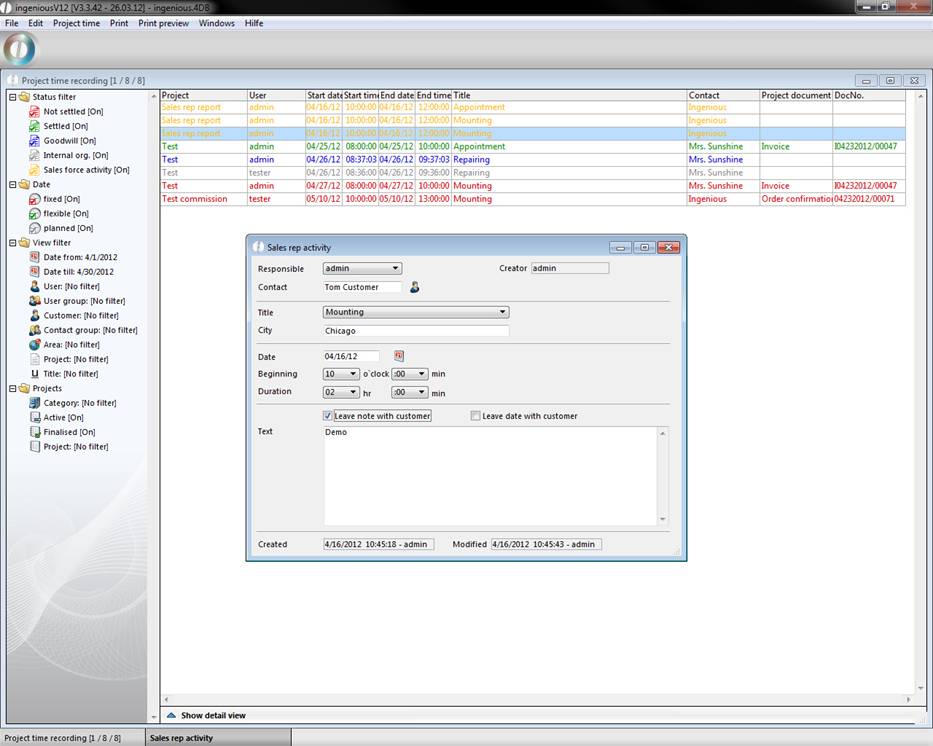
Creating a sales rep activity
In the Time Management, you can put a field service appointment in the list view. Next, the corresponding report right, “Time Recording – Sales rep appointments” has to be unlocked in the user administration. In order to create a field service appointment, you only need to hold the Alt key when creating a project entry.
List view /Calendar view
By clicking the button ![]() you will switch from the list view to the calendar view. In the calendar view you will find potential overlapping dates quicker. Also when you have got a postponement you change the dates really convenient by drag and drop.
you will switch from the list view to the calendar view. In the calendar view you will find potential overlapping dates quicker. Also when you have got a postponement you change the dates really convenient by drag and drop.
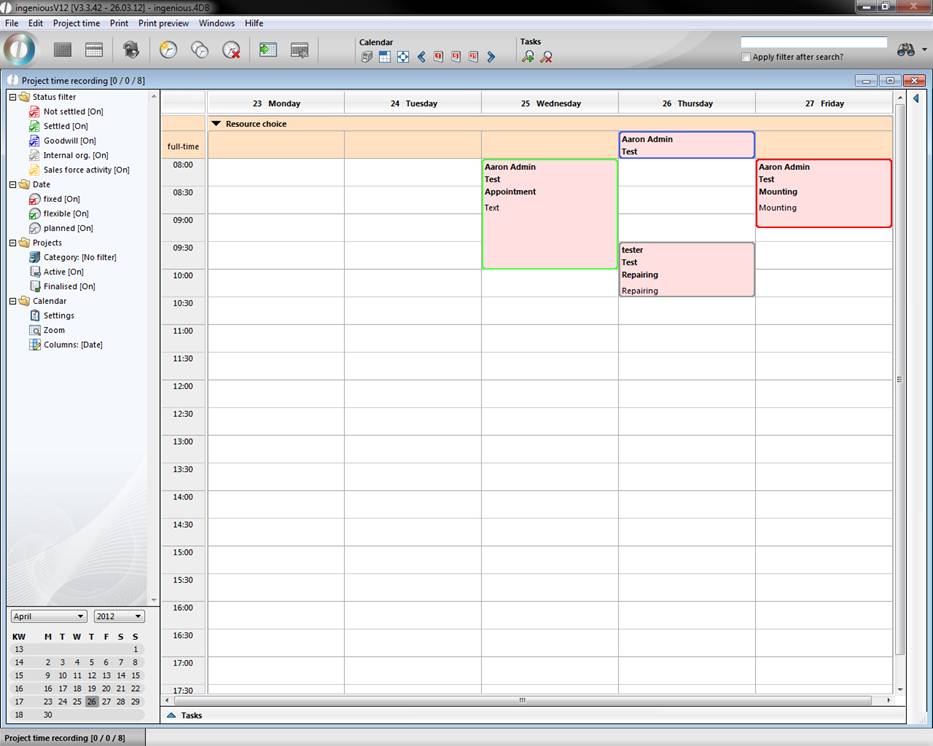
In order to get the exact overview that you need, numerous filter possibilities as in the list view are available to you. The filters are divided into three areas that include status filter, view filter and calendar. To list the project times, for instance, according to user, select the “Calendar” category and the respective “User” menu entry in the “Columns” filter.
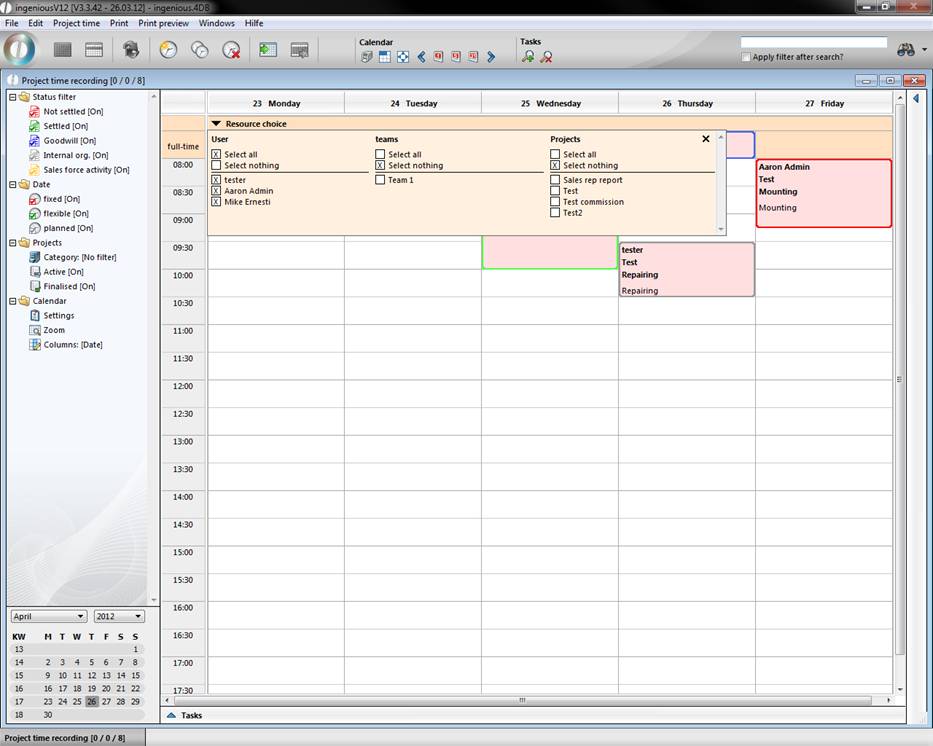
When you click on ![]() a pop up window will be displayed where all users, teams and commissions are listed. Here you have got the possibility to filter these resources.
a pop up window will be displayed where all users, teams and commissions are listed. Here you have got the possibility to filter these resources.
When you click on ![]() to the right of the scroll bar the project assignment will open up. Here you can view all projects that are bind to a date in a certain time frame.
to the right of the scroll bar the project assignment will open up. Here you can view all projects that are bind to a date in a certain time frame.
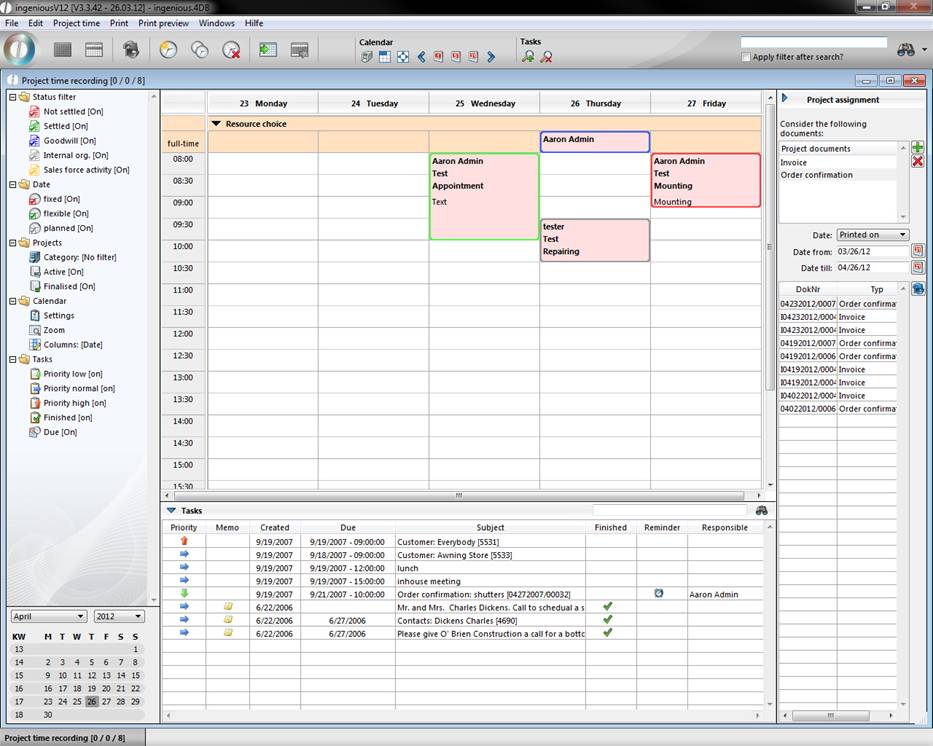
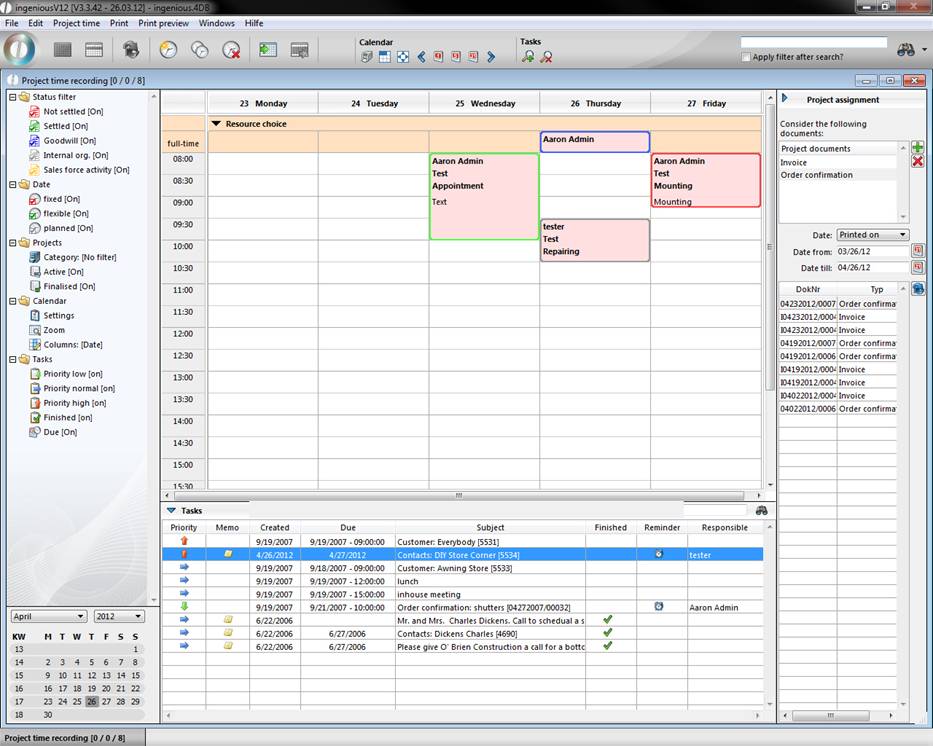
Below the calendar view you can find a list of all tasks by clicking ![]() . The information will be shown, which priority belongs to the task, whether a memo was sent to the employee or not, the date of creation, due date, subject, whether it is finished, whether the employee will be reminded and who has created the task.
. The information will be shown, which priority belongs to the task, whether a memo was sent to the employee or not, the date of creation, due date, subject, whether it is finished, whether the employee will be reminded and who has created the task.
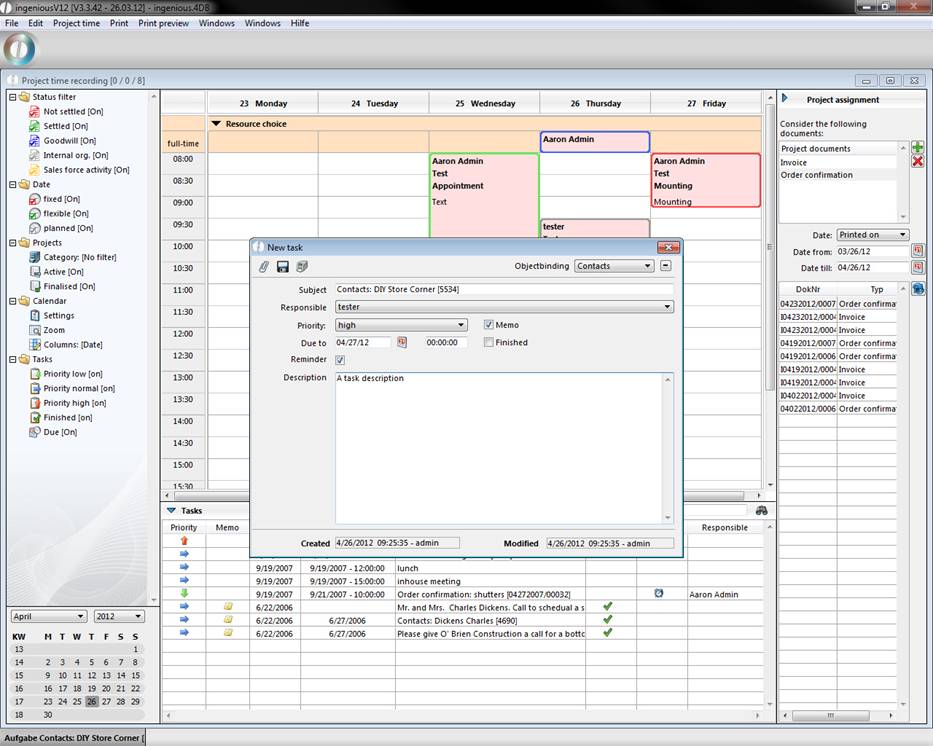
To create a new task you have to click on ![]() . In the new window you have to bind the task to an object (contact, item, project or purchase), which will be mentioned in the subject line. With the help of the button
. In the new window you have to bind the task to an object (contact, item, project or purchase), which will be mentioned in the subject line. With the help of the button ![]() , you can switch to the corresponding attachment.
, you can switch to the corresponding attachment.
A created task can be deleted by selecting it and clicking on ![]() .
.
Print options
There are three print options in Time Management. If not all three are shown, please select your report rights in the user administration.
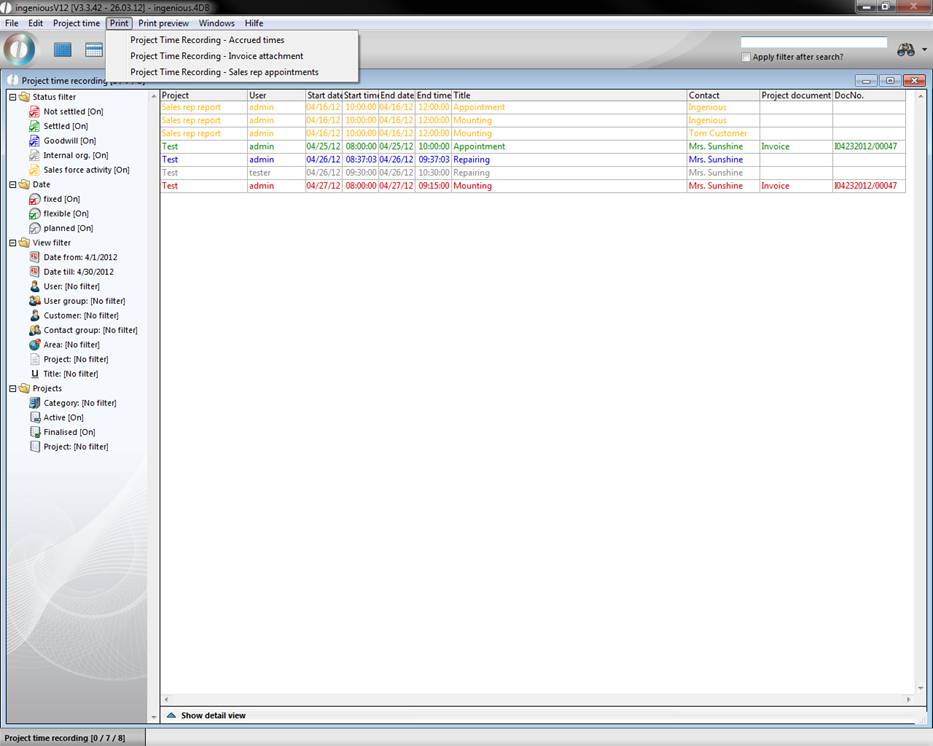
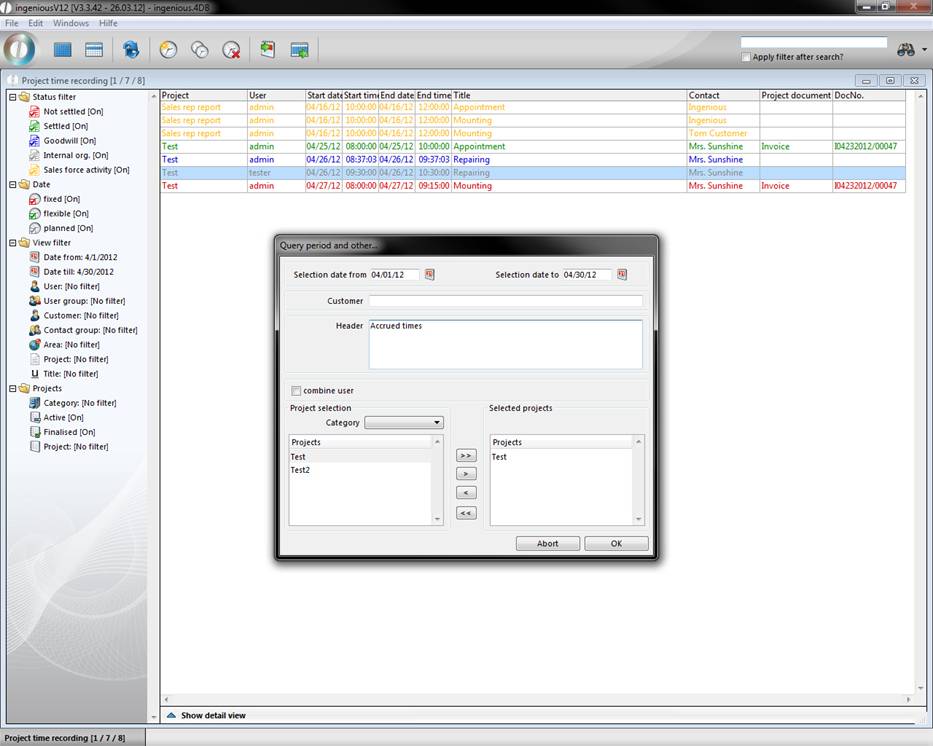
You can create a settlement of all collected service hours with “Project Time Recording – Accrued times” and print it out. In the window that appears, you have the possibility to determine the settlement period and to select one or several projects. In addition, you can also allow the work expense to be given out in relation to a customer and provide a heading for the list.
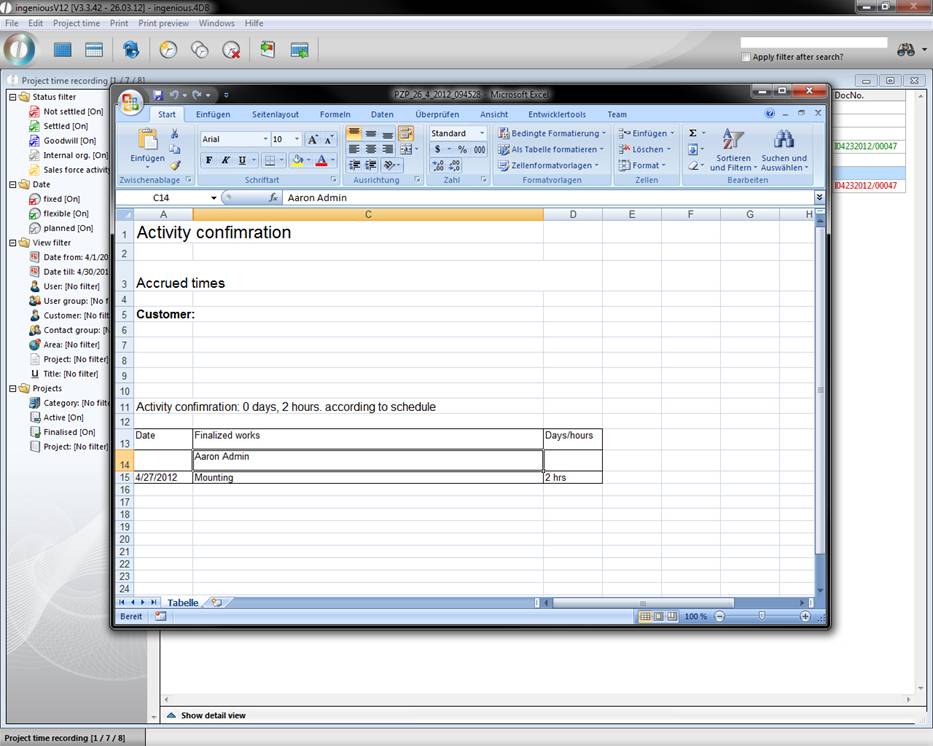
If you have selected and confirmed the necessary settings, the Microsoft Excel program begins with the help of the file “PZP_Template.xml”. The XML file is entered in the client list of Ingenious.V12 and can be adapted if necessary. In the Excel table, all work hours are automatically listed and added up. You can insert one more text and then print out the activity report as usual.
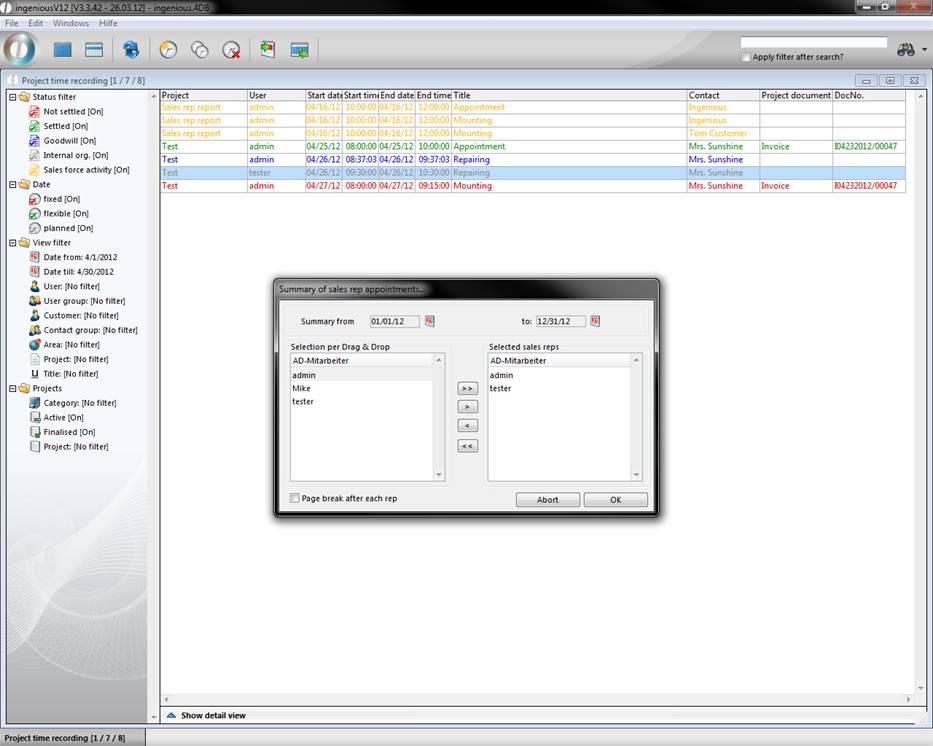
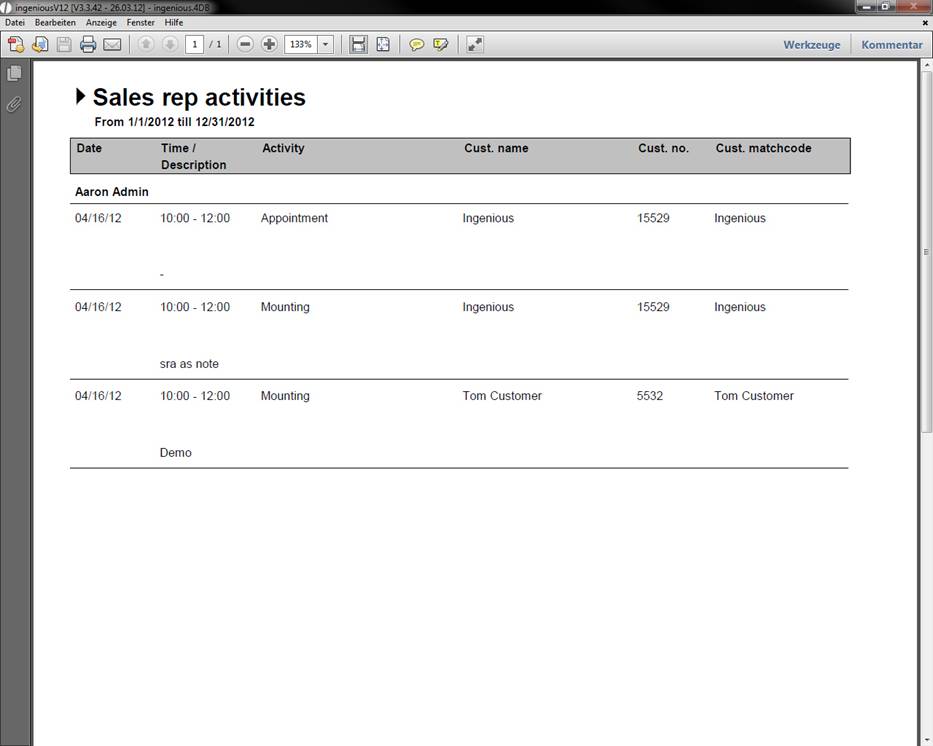
Under the print option “Project Time Recording – Sales rep appointments”, you can print out all field service appointments from a time period. Before printing, the considered time period and the respective employees must be determined.
The print option, “Project time planning – Invoice attachment” has not been added since it is still being developed.